After you have completed learning how to enter your client information into the platform and how to select the sites you would like to post your reviews on, you will need to learn how to configure your account in order to get the best results. So now, we will go through some basic settings options in your account.
Learn all the details in the following video:
Don’t like video and want step-by-step instructions? We got you covered, just follow the instructions below:
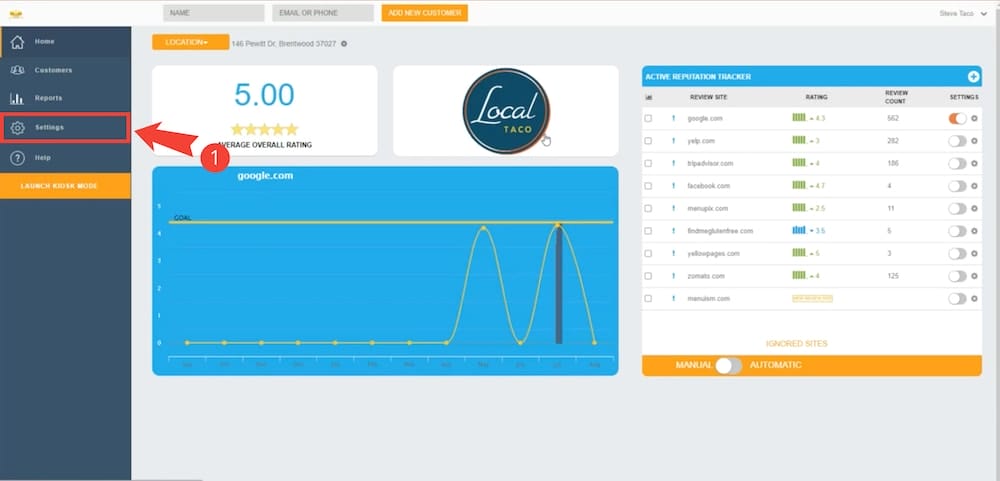
First, you will need to click on the “Settings” section on the left side menu where we will be setting up your account.
Your profile
We will need to select the “Users” tab (step 1) and be sure that “YOUR PROFILE” section has been selected (step 2)
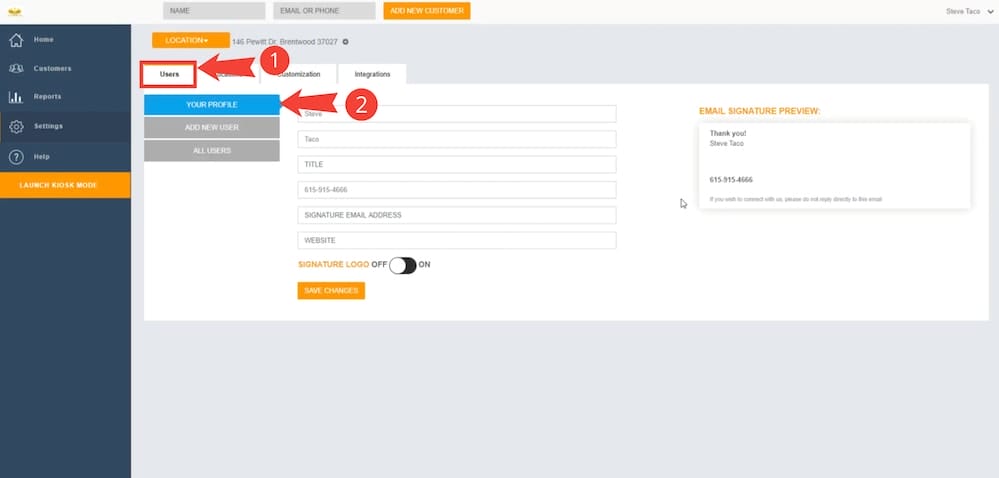
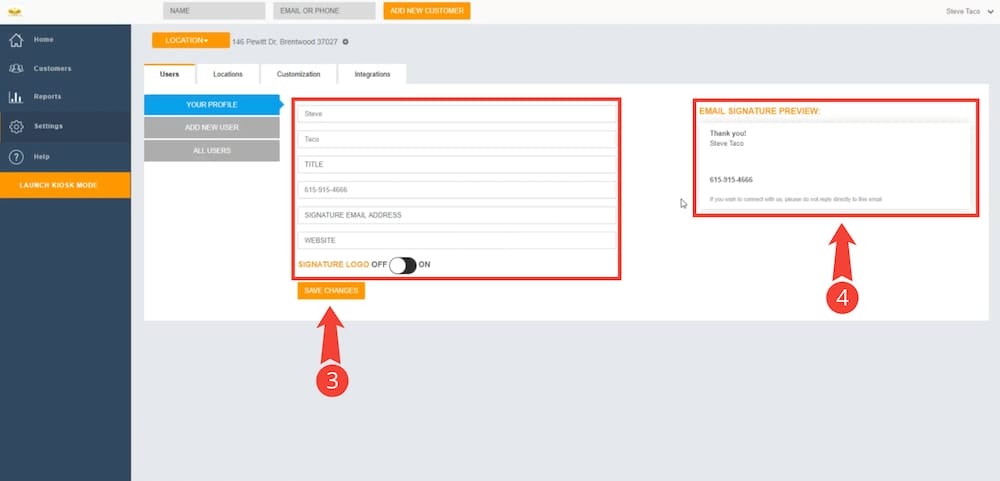
Next, you will have to validate and change (if necessary) your information included in your profile (step 3). To finish this process, all you have to do is click on the “SAVE CHANGES” button, also included in step 3.
IMPORTANT: Take notice that every piece of information poured into the fields on step 3 will be used as an “email signature” for every customer that you interact with (as shown on step 4).
Your location
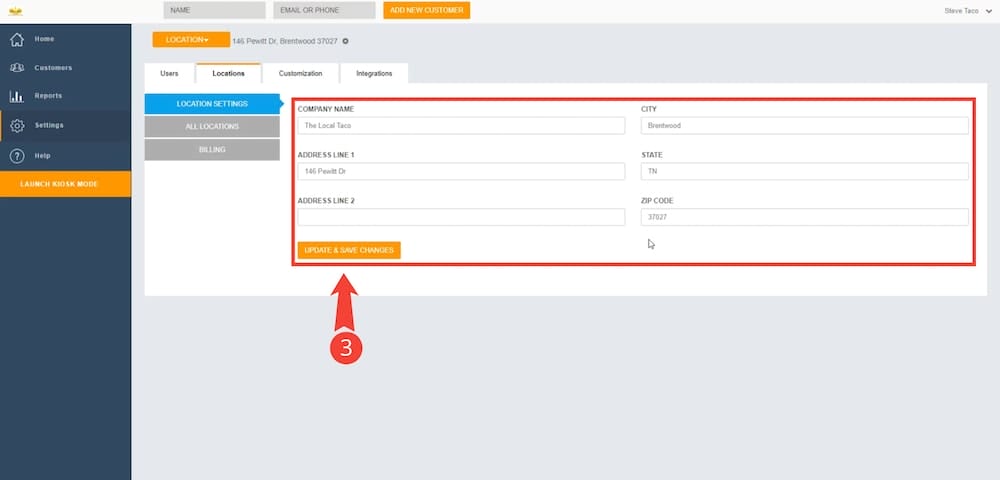
We will need to select the “Locations” tab (step 1) and be sure that “LOCATION SETTINGS” section has been selected (step 2)
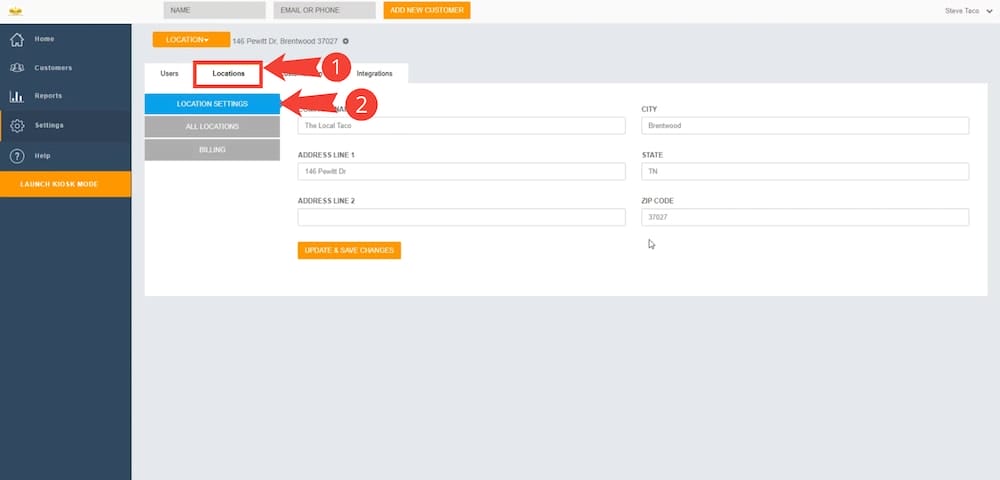
Next, you will have to validate and change (if necessary) your information included in your location, this information has been prefilled by us to make things simpler. To finish this process, all you have to do is click on the “UPDATE & SAVE CHANGES” button (step 3).
Delivery method
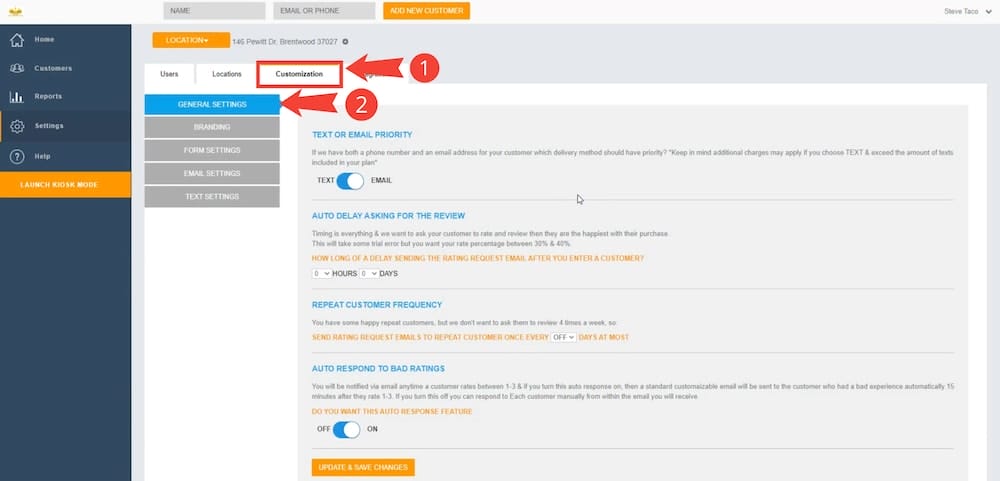
In order to select which preferred delivery method (text or email) we will use to ask for reviews, we need to select the “Customization” tab (step 1) and be sure that “GENERAL SETTINGS” section has been selected (step 2)
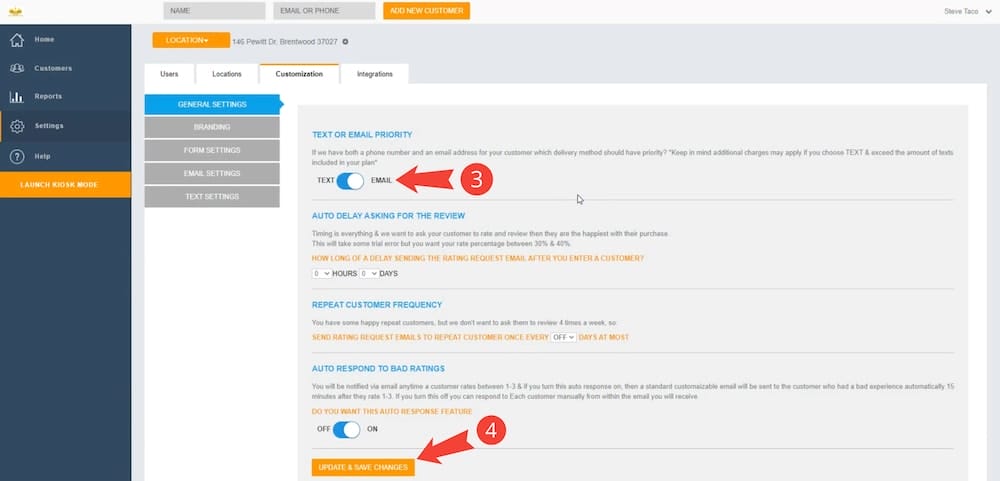
Next, you will have to select via the toggle shown in step 3 which delivery method you will prefer to use to ask for reviews from your clients. To finish this process, all you have to do is click on the “UPDATE & SAVE CHANGES” button (step 4).
IMPORTANT: Text SMS’s do get open more often than emails, but emails are more effective in getting public reviews. In general, we have seen just a 5 stars reviews responses via text (no keywords included) and longer reviews (more keywords included) when email has been selected as the delivery method.
Auto delay
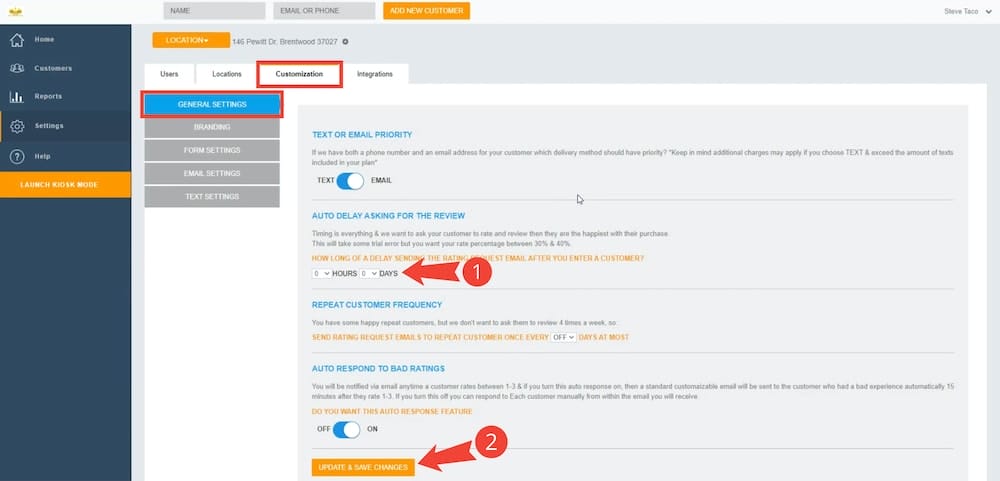
You want to ask your client to rate their experience when they are the happiest about your service or product. This changes from industry to industry, so in order to set up auto delay for your specific needs you need to be in “Customization” > “GENERAL SETTINGS” section. This is a really important feature, depending on what kind of business you have, you may want review requests to go out right away, or you may want to wait. With our timer delay feature, you can choose when the review request is automatically sent out (hours/days), you decide.
Around the 36-second mark in the video above, we explain a couple of scenarios on why this feature is important, go and check the video out. We have found, that certain businesses will get 30% to 40% more reviews by doing a review request delay.
How to set it up? Simple, select the number of hours and/or days you want the review request to be delayed (step 1), and then just click the “UPDATE & SAVE CHANGES” button (step 2).
Branding
To set up or edit your branding you need to be in “Customization” > “BRANDING” section.
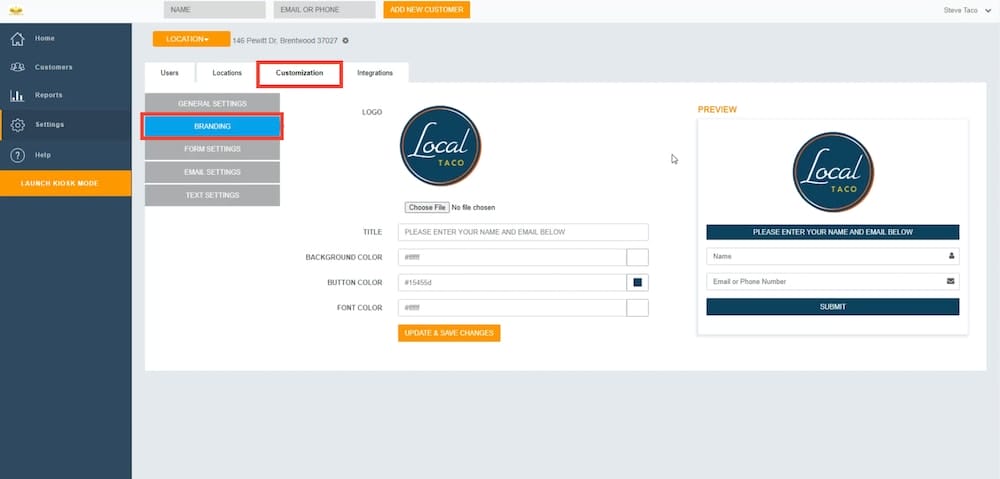
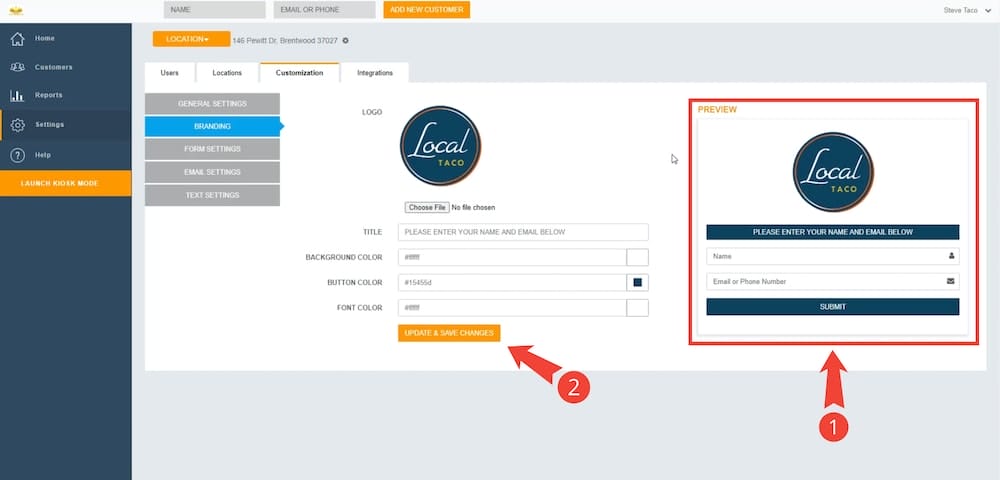
Once inside the section, you will be able to edit your logo, title, background color, button color and font color. Any change made can be previewed in the PREVIEW section (step 1). In order to complete the branding changes, you will only need to click on the “UPDATE & SAVE CHANGES” button (step 2).
TIP: You don’t know the color codes used in your logo? Don’t worry, you can use the site https://imagecolorpicker.com/. What you need to do is:
- Upload your logo via the “Use Your Image” button
- Select the color you want from the “PALETTE” generated from your logo
- Copy the HEX code shown below
- Paste the HEX code over the desire field (background color, button color or font color) in the RGV Reviews branding section.
Internal feedback form
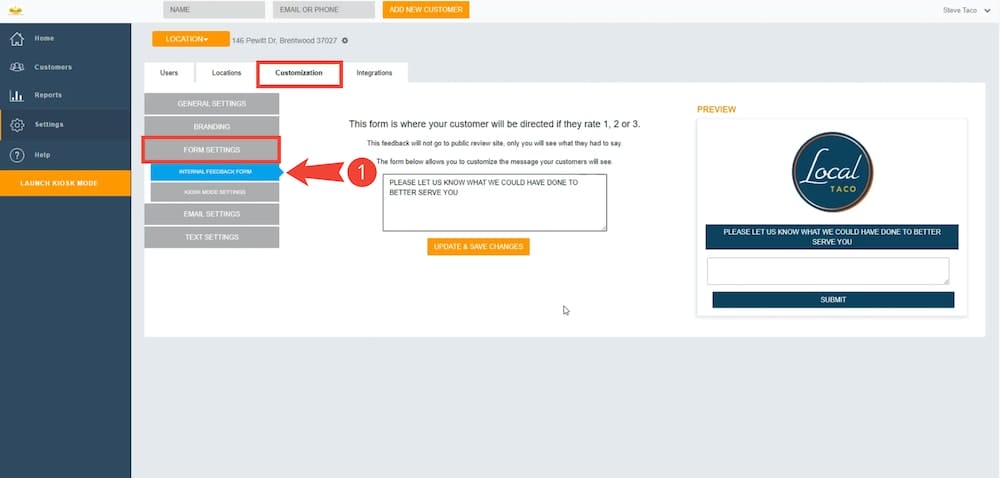
This is the form where your customer will be redirected if they rate 1, 2 or 3 on your review request. To set up or edit your internal feedback form you need to be in “Customization” > “FORM SETTINGS” section. Make sure to be on the “INTERNAL FEEDBACK FORM” sub-section as shown in step 1 in the photo below.
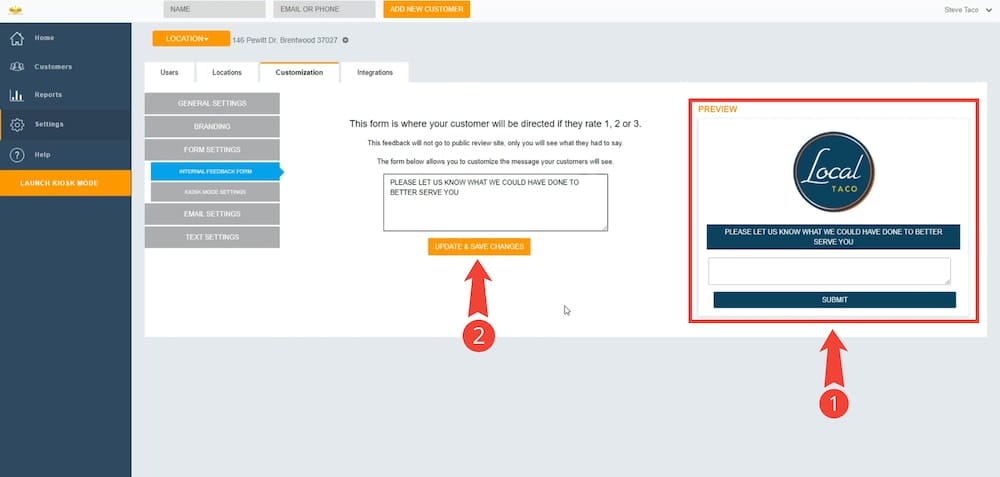
Once inside the section, you will be able to edit the message shown to your client. Any change made can be previewed in the PREVIEW section (step 1). In order to complete the desired changes, you will only need to click on the “UPDATE & SAVE CHANGES” button (step 2).
Kiosk mode
To set up or edit your kiosk mode settings you need to be in “Customization” > “FORM SETTINGS” section. Make sure to be on the “KIOSK MODE SETTINGS” sub-section as shown in step 1 in the photo below.
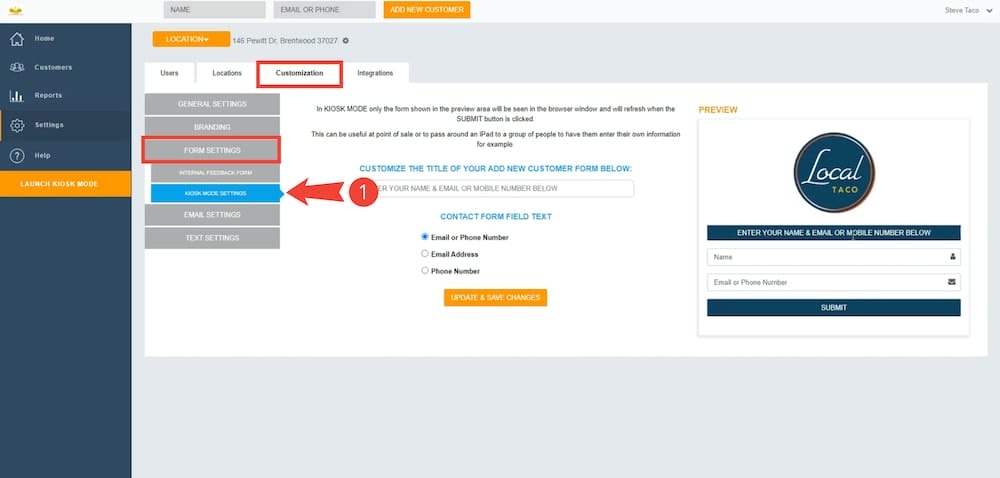
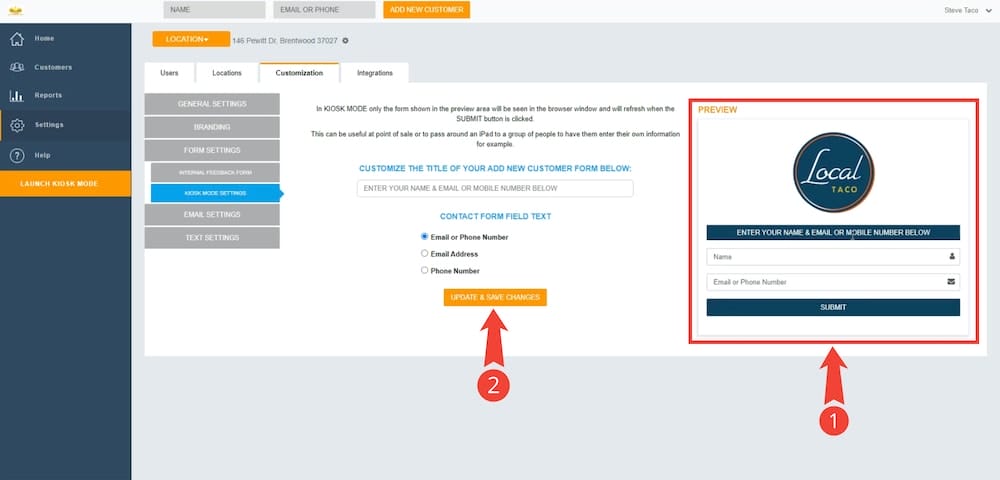
Once inside the section, you will be able to edit the fields of your kiosk mode form. Any change made can be previewed in the PREVIEW section (step 1). In order to complete the desired changes, you will only need to click on the “UPDATE & SAVE CHANGES” button (step 2).
Email settings
1.- RATING REQUEST EMAIL
This is the email that your customer will receive asking them to leave a review for your business. To set up or edit your rating request email you need to be in “Customization” > “EMAIL SETTINGS” section. Make sure to be on the “RATING REQUEST EMAIL” sub-section as shown in step 1 in the photo below.
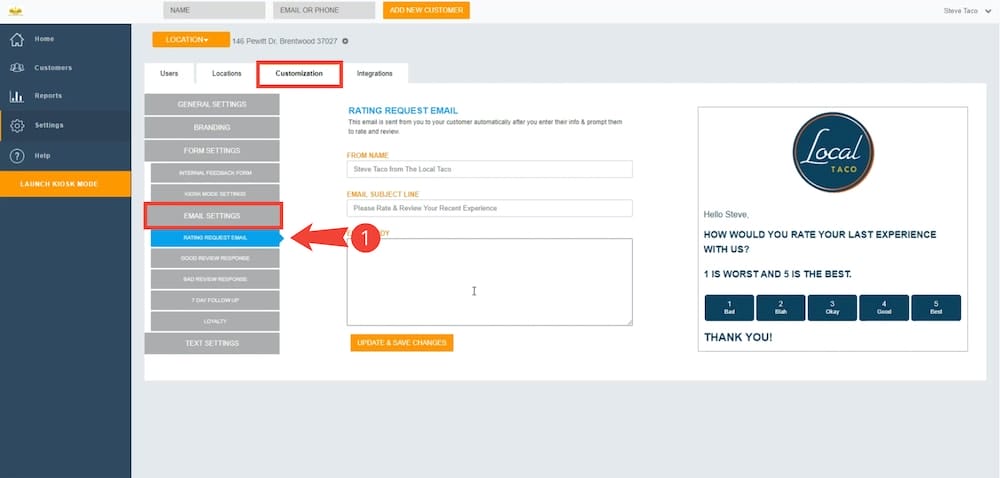
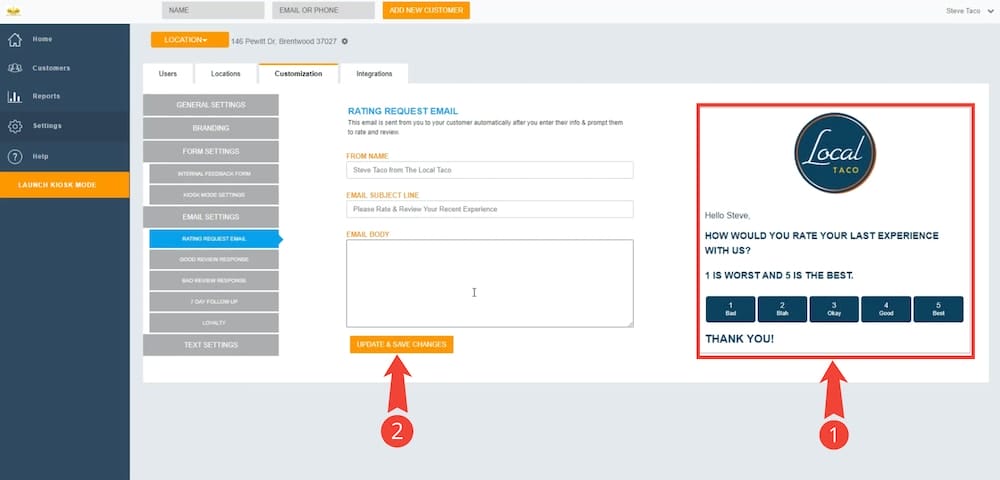
Once inside the section, you will be able to edit the fields of your rating request email. Any change made can be previewed in the PREVIEW section (step 1). In order to complete the desired changes, you will only need to click on the “UPDATE & SAVE CHANGES” button (step 2).
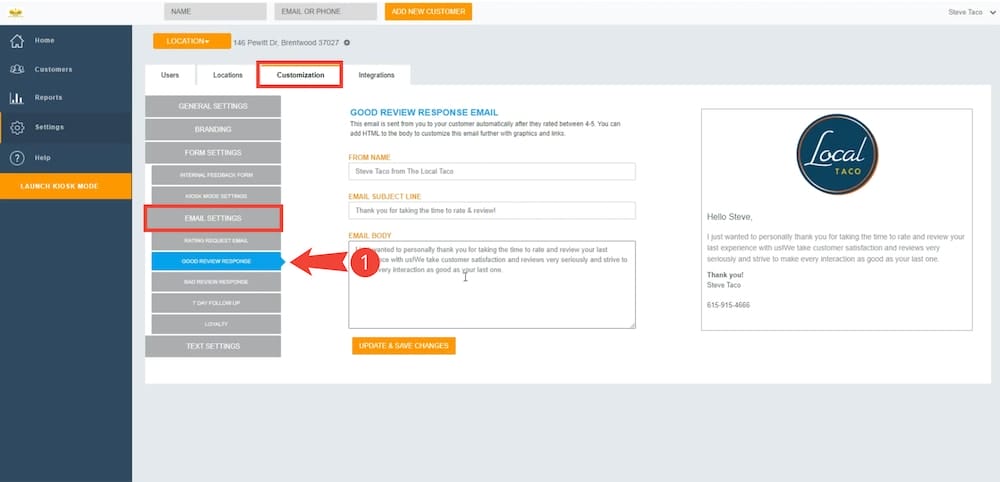
2.- GOOD REVIEW RESPONSE
This is the email your customer will receive automatically from you, 15 minutes after they rate between 4-5. To set up or edit your good review response you need to be in “Customization” > “EMAIL SETTINGS” section. Make sure to be on the “GOOD REVIEW RESPONSE” sub-section as shown in step 1 in the photo below.
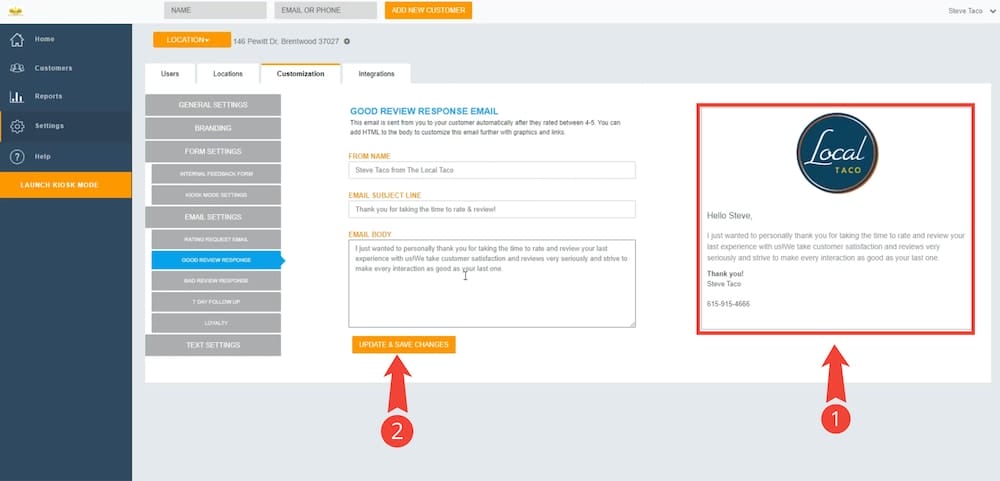
Once inside the section, you will be able to edit the fields of your good review response. Any change made can be previewed in the PREVIEW section (step 1). In order to complete the desired changes, you will only need to click on the “UPDATE & SAVE CHANGES” button (step 2).
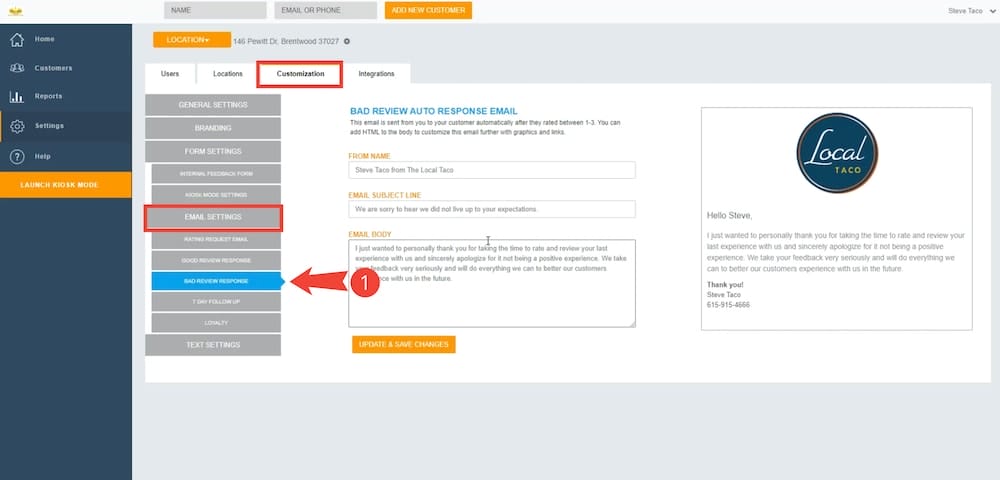
3.- BAD REVIEW RESPONSE
This is the email your customer will receive automatically from you, 15 minutes after they rate between 1-3. To set up or edit your bad review response you need to be in “Customization” > “EMAIL SETTINGS” section. Make sure to be on the “BAD REVIEW RESPONSE” sub-section as shown in step 1 in the photo below.
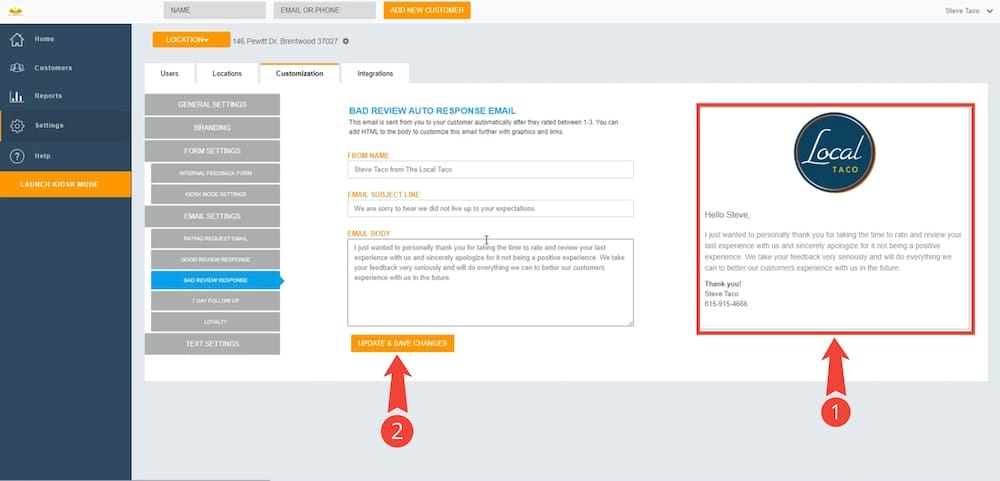
Once inside the section, you will be able to edit the fields of your bad review response. Any change made can be previewed in the PREVIEW section (step 1). In order to complete the desired changes, you will only need to click on the “UPDATE & SAVE CHANGES” button (step 2).
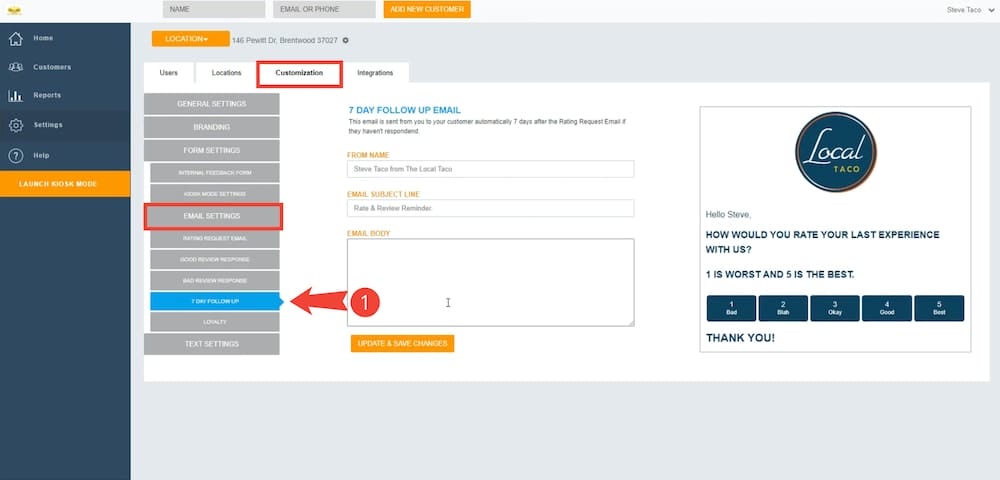
4.- SEVEN-DAY FOLLOW UP
This is the email your customer will receive automatically from you 7 days after the rating request email if they haven’t responded. To set up or edit your seven-day follow up email you need to be in “Customization” > “EMAIL SETTINGS” section. Make sure to be on the “7 DAY FOLLOW UP” sub-section as shown in step 1 in the photo below.
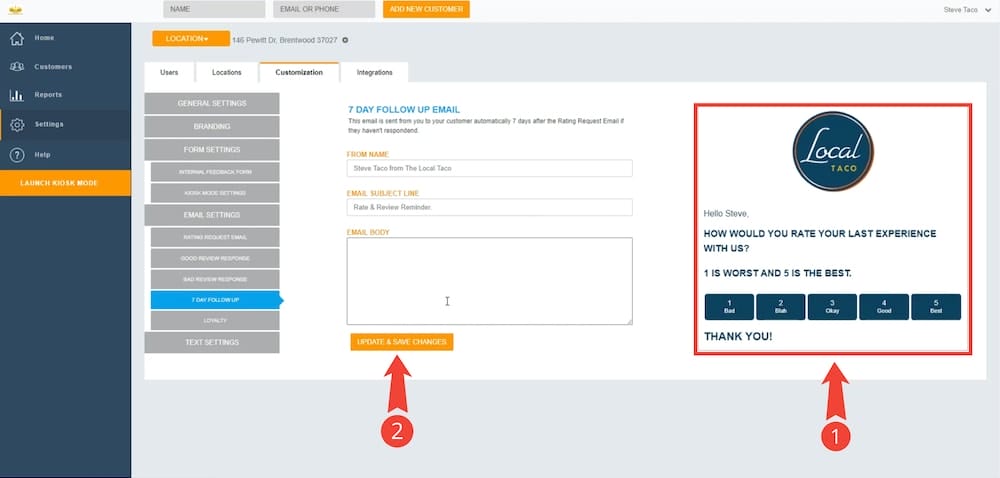
Once inside the section, you will be able to edit the fields of your seven-day follow up email. Any change made can be previewed in the PREVIEW section (step 1). In order to complete the desired changes, you will only need to click on the “UPDATE & SAVE CHANGES” button (step 2).
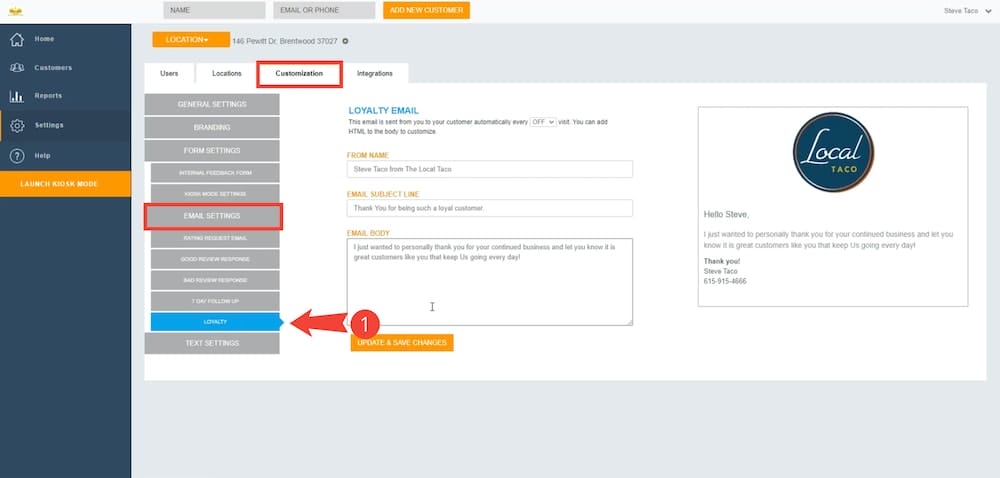
5.- LOYALTY
If you want to set up a loyalty type program, you can do that with us as well, this email will be sent out every certain number of visits. To set up or edit your loyalty email you need to be in “Customization” > “EMAIL SETTINGS” section. Make sure to be on the “LOYALTY” sub-section as shown in step 1 in the photo below.
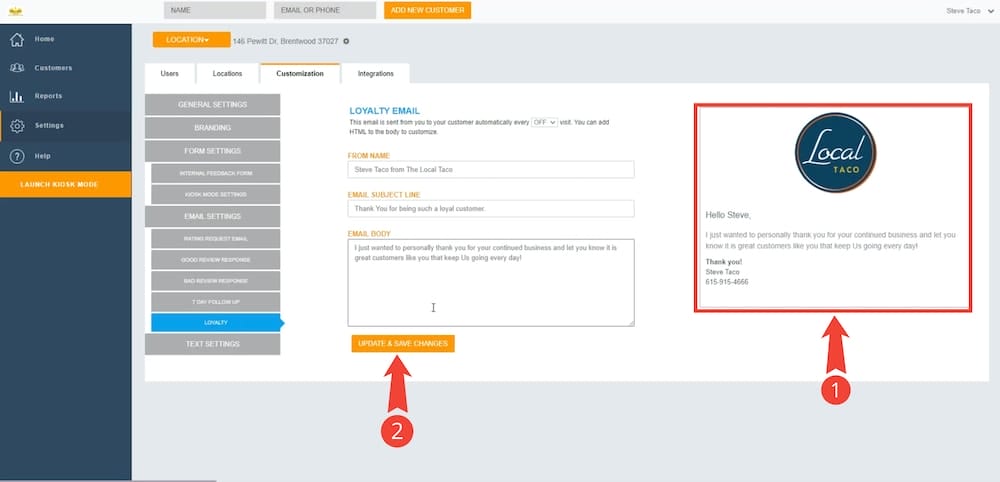
Once inside the section, you will be able to edit the fields of your loyalty email. Any change made can be previewed in the PREVIEW section (step 1). In order to complete the desired changes, you will only need to click on the “UPDATE & SAVE CHANGES” button (step 2).
Text settings
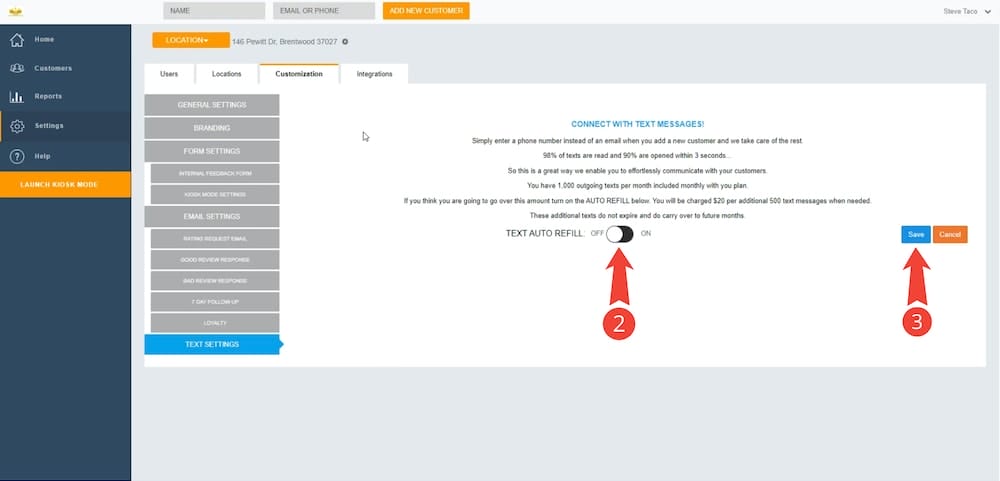
SMS is an additional way to connect with your clients when it is time to ask for a review. You have 1,000 outgoing texts per month included with your plan. If you think you are going to surpass this amount, you can turn on the auto refill feature for $20 USD per additional 500 text messages when needed.
To set up or edit your auto refill feature you need to be in “Customization” > “TEXT SETTINGS” section as shown in step 1 on the image below.

Now, to activate or deactivate your text auto refill feature, please just follow the instructions below:
1.- Use the toggle to activate or deactivate your auto refill feature (step 2)
2.- Save your changes by clicking on the “Save” button (step 3)
Integrations
Let’s start by explaining what an integration is… Basically, an integration means that 2 software applications can talk to each other, so by integrating RGV Reviews with another software, the only thing that you will need to do is do your business as usual. Once the integration has been completed, you will not need to enter your customer information manually into our software… the integration will do it automatically for you, and you will start getting reviews on autopilot!
Example: Your business uses Quickbooks to send invoices to your clients, once you generate and send that invoice Quickbooks will notify and send your client’s name, email or phone directly into RGV Reviews and our system will send the rating request email automatically to your client asking for a review.
Do not worry! Quickbooks (as we use it in this example), will NEVER send information to RGV Reviews other than your client’s name, email or phone.
ZAPIER / API KEY
To configure any automation, you will need an API KEY that you could find it in “Integrations” > “ZAPIER” section as shown in step 1 on the image below.
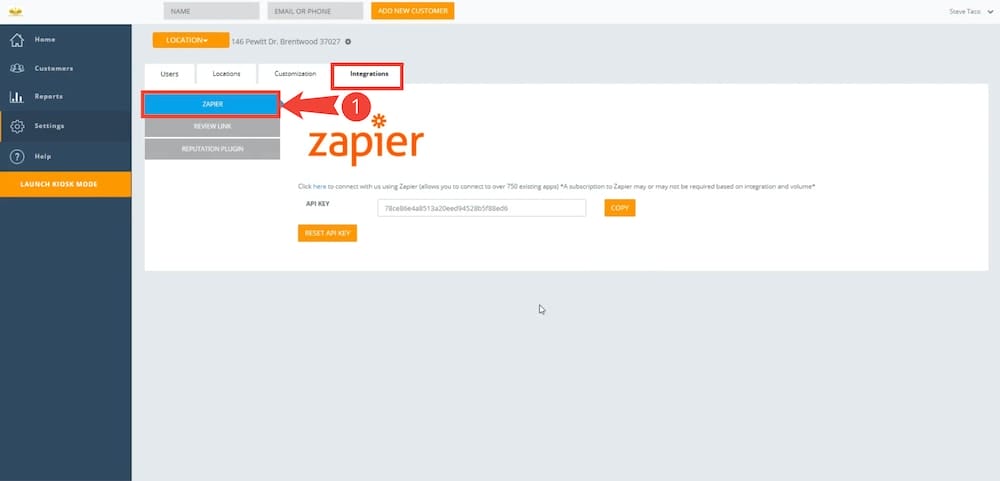
If you don’t have the experience making integrations between software programs you can Contact Us, and we would gladly help.